Impatient Baguettes

October 27, 2015

IMG_0003

3 loaves.    takes around 1.5 hours from start to eating.

1) Warm up the oven for a few minutes with a pan of warm water in the oven.  I put this on the top shelf… since otherwise, you steam the bread a bit.        You don’t want the oven very hot, just warm so that rising the bread goes faster.   Maybe 120 degrees.     The water will keep the bread from drying out.
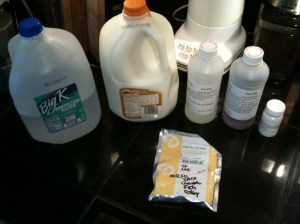
2) In the kitchen Aid Bowl measure:
a) 250 gram bread flour.   (~4 cups.)
b) 1 Tablespoon. dry active yeast.  (A packet is close enough)
c) 1/2 teaspoon salt.
d) 1 cup + of water.   (you can add a little more depending on the flour type. this is about 260 grams of water.)
3) Mix briefly together then let sit for 10 minutes.
4) TURN OFF the oven if you haven’t done so already.
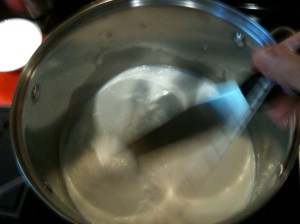
5) Beat the dough in the kitchen aid on high until it pulls off the bottom of the bowl.      (It starts out nearly like pancake batter, but beating it for 15 minutes on high in the kitchen aide should develop the gluten enough that it will hang together, start pulling off the sides of the bowl, and then off the bottom of the bowl.   If you’re using all purpose flour, it will probably take longer.     if you’re using some portion whole wheat, it will come together faster, but the texture wont be as stretchy, so I’d recommend adding a little more water.)     KEEP AN EYE ON THE MIXER, as it likes to start walking along the counter towards the end of this!

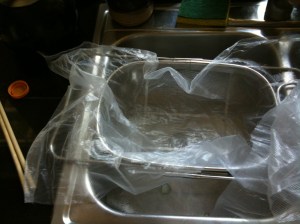
6) Meanwhile,  Line deep french bread pans with parchment paper:  *IMPORTANT*!   (You want it a little wider then the bread trough so you can fold it over on the bread, and as it rises, it has some extra to keep the wet sticky dough off the pan. )
7) I just use my hands to rip the dough into 3 or 4 long loaves, and then place it on the bread pans, leaving 2-3 inches to the ends of the pans.  (Otherwise it will ooze / rise out of the pan)  It will stick a bit to your hands, but not too much if the gluten has been developed properly.     You can tear pieces off and re-adhere them to redistribute the dough, since it’s tricky to divide it evenly.

IMG_0014
8) Fold the parchment paper over the top of the loaves.. (optional)
9) Rise them pans in the oven (Turned off) for 15-30 mins     Good to check at 15 minutes to make sure the pans aren’t overflowing.  You want them just ABOUT overflowing… but not quite.

10) Gently pull the Pans out of the oven.   The parchment paper should have opened a bit as the loaf rose inside of it.
11)   If the dough is running out of the end of the pan, just fold the end over and stick it to the top of the loaf.
12)  Optionally, you can distress the top of the loaf a bit.  ( you can lightly score the tops of them , or brush an egg wash on… or sprinkle with flour.)   I’ve not played with all of these yet.
13)  Preheat the oven to 500 degrees, with the pan of water still in there.  (This will take around 20 minutes.)

14) Bake for 20 minutes.     The bottoms brown faster than the tops at least in my french bread pans…
15) Roll the loaves over in their pans, remove the parchment paper and bake another 5- 10 minutes with the tops down until they’re golden brown.
16) Cool.    Store in paper bags.        Crust will be crunchy fresh out of the oven…    it will soften for the rest of the day.  The next day the crust should dry out and firm up again.

Originally derived from Jason’s Quick Ciabatta recipe (google it) , except for the rising, and lack of pizza stone.. etc. etc….   really a different recipe now.

Identifying Hybrid iOS Apps from binaries

April 23, 2015

Recently I had the opportunity to engage in a bit of a research project to examine commonly used app technologies within a specific industry vertical.   It was useful for this exercise to try to coorelate app store ratings to the underlying technologies which were used to the develop the app, specifically with an eye towards hybrid apps, and how they compare to fully native, and Ahead of Time compiled apps. (Xamarin)

It turns out that many example customers with hybrid providers such as Kony or PhoneGap supply are no longer on the platform, at least for the industry vertical I examined.

In any case I wanted to document the process, as I’m sure it could be automated, and it’s always fun to poke around in large corporations apps to see what can be found.   (Occasionally some pretty *interesting* decisions.)

1. From iTunes on your Mac, Download the app in question.

Screen Shot 2015-04-22 at 10.01.16 PMScreen Shot 2015-04-22 at 9.56.15 PM

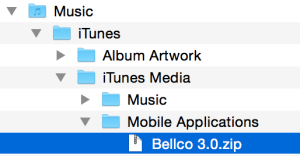
2. Open your home directory in the finder, open the Music folder, then Mobile Applications and find the new ipa file. (this is for iTunes 12.1…    other versions may have slightly different folder structures.

Screen Shot 2015-04-22 at 9.58.55 PM

3. Rename the .ipa extension to .zip.

Screen Shot 2015-04-22 at 9.59.14 PM

4. Expand the zip file, then Navigated into the Payload directory, right click on the file inside and then Choose “Show Package Contents”  – Sometimes you can learn something about the app just from the File name in the Payload…   for examples some apps showed Mobiliti as the title which turned out to indicate that this was the Saas which had generated the app.

Screen Shot 2015-04-22 at 9.59.58 PM

5. The tell tale sign (in case you couldn’t tell from your app experience is a html or www folder inside the package: )

Screen Shot 2015-04-22 at 10.00.36 PM

In this case we can see that phone gap was used, as well as google analytics, and a bunch of other javascript frameworks to help drive the HTML in the hybrid app.

Another Tell seems to be lack of .xib files in the package.    Lots of .xib files generally means full Native.     Still working on Xamarin detection.

iOS apps with initial Core Data database image

March 12, 2015

Frequently, it’s useful to ship an iOS app with a preconfigured CoreData database, so that on initial launch the data doesn’t need to be retrieved from a webservice before presenting it to the user / or immediately loaded from a plist shipping with the file.

This used to be easy pre iOS 7.0:   Launch in the simulator and ensure you’ve populated the datastore with the data you want to chip.   Then find the sqlite3 datafile on your mac.   That’s easily done with a breakpoint in the persistentStoreCorrdinator:

FindingTheDbImage

Then copy it into your project

BINGOSABI:bingosabi$ cd /Users/bingosabi/Library/Developer/CoreSimulator/Devices/
7FD9730C-F002-414D-9F72-8D6BAA750A3B/data/Containers/Data/Application/0A3AB0EE-
D557-4FE7-9683-3C337C64A7E9/Documents/db.sqlite
BINGOSABI:Documents$ cp db.sqlite ~/Projects/ExampleApp/Resources


In iOS 7.0 however, but Apple updated the shipping version of sqlite3 which enabled a separate journaling file.   Now a database has three files.

BINGOSABI:Documents bingosabi$ ls
db.sqlite	db.sqlite-shm	db.sqlite-wal

So in order to ship a populated databases we have to do a few extra steps.

sqlite> pragma journal_mode=off;
off
sqlite> vacuum
sqlite> .exit

Copy ONLYthe vacuumed db.sqlite to the Xcode project and include it.

BINGOSABI:bingosabi$ cd /Users/bingosabi/Library/Developer/CoreSimulator/Devices/
7FD9730C-F002-414D-9F72-8D6BAA750A3B/data/Containers/Data/Application/0A3AB0EE-
D557-4FE7-9683-3C337C64A7E9/Documents/db.sqlite
BINGOSABI:Documents$ cp db.sqlite ~/Projects/ExampleApp/Resources

If you used the default template for a Core Data app, then replace the default persistentStoreCorrdinator with the following code: (Note that you have to always touch that anyways if you’re submitting to the store due to the abort(); poison pill which Apple has in the template. Not removing the abort(); is a rejection-able offense.

So replace this:

- (NSPersistentStoreCoordinator *)persistentStoreCoordinator {
    // The persistent store coordinator for the application. This implementation creates and return a coordinator, having added the store for the application to it.
    if (_persistentStoreCoordinator != nil) {
        return _persistentStoreCoordinator;
    }
    
    // Create the coordinator and store
    
    _persistentStoreCoordinator = [[NSPersistentStoreCoordinator alloc] initWithManagedObjectModel:[self managedObjectModel]];
    NSURL *storeURL = [[self applicationDocumentsDirectory] URLByAppendingPathComponent:@"db.sqlite"];
    NSError *error = nil;
    NSString *failureReason = @"There was an error creating or loading the application's saved data.";
    if (![_persistentStoreCoordinator addPersistentStoreWithType:NSSQLiteStoreType configuration:nil URL:storeURL options:nil error:&error]) {
        // Report any error we got.
        NSMutableDictionary *dict = [NSMutableDictionary dictionary];
        dict[NSLocalizedDescriptionKey] = @"Failed to initialize the application's saved data";
        dict[NSLocalizedFailureReasonErrorKey] = failureReason;
        dict[NSUnderlyingErrorKey] = error;
        error = [NSError errorWithDomain:@"YOUR_ERROR_DOMAIN" code:9999 userInfo:dict];
        // Replace this with code to handle the error appropriately.
        // abort() causes the application to generate a crash log and terminate. You should not use this function in a shipping application, although it may be useful during development.
        NSLog(@"Unresolved error %@, %@", error, [error userInfo]);
        abort();   //POISON PILL
    }
    
    return _persistentStoreCoordinator;
}

with this:

- (BOOL)addSkipBackupAttributeToItemAtURL:(NSURL *)URL
{
    //This is required for cached data lest Apple reject for immediately writing data to Documents which isn't user data and has default iCloud backup attribute.
    NSError *error = nil;
    BOOL success = [URL setResourceValue: [NSNumber numberWithBool: YES]
                                  forKey: NSURLIsExcludedFromBackupKey error: &error];
    if(!success){
        NSLog(@"Error excluding %@ from backup %@", [URL lastPathComponent], error);
    }
    return success;
}

- (void) copyDatabaseFromBundle:(NSURL *)storeURL {
    NSError *error = nil;
    NSString *databaseName = [[storeURL lastPathComponent] stringByDeletingPathExtension];
    NSString *databaseExtension = [storeURL pathExtension];
    NSURL *shippingDatabaseImage = [[NSBundle mainBundle] URLForResource:databaseName withExtension:databaseExtension];
    
    NSURL * toURL = [[[self applicationDocumentsDirectory] URLByAppendingPathComponent:databaseName] URLByAppendingPathExtension:databaseExtension];
    
    [[NSFileManager defaultManager] copyItemAtURL:shippingDatabaseImage toURL:toURL  error:&error];
    
    [self addSkipBackupAttributeToItemAtURL:toURL];
}

- (void) deleteDatabase:(NSURL *)storeURL {
    //Delete all the write ahead log files. 
    [[NSFileManager defaultManager] removeItemAtURL:storeURL error:nil];
    [[NSFileManager defaultManager] removeItemAtURL:[NSURL URLWithString:[storeURL.absoluteString stringByAppendingString:@"-wal"]] error:nil];
    [[NSFileManager defaultManager] removeItemAtURL:[NSURL URLWithString:[storeURL.absoluteString stringByAppendingString:@"-shm"]] error:nil];
}

- (NSPersistentStoreCoordinator *)persistentStoreCoordinator {
    if (!_persistentStoreCoordinator) {
        NSManagedObjectModel *model = [self managedObjectModel];
        
        static dispatch_once_t onceToken;
        dispatch_once(&onceToken, ^{
            // Create the coordinator and store
            _persistentStoreCoordinator = [[NSPersistentStoreCoordinator alloc] initWithManagedObjectModel:model];
            NSURL *storeURL = [[self applicationDocumentsDirectory] URLByAppendingPathComponent:@"db.sqlite"];
            NSError *error = nil;
            NSString *failureReason = @"There was an error creating or loading the application's saved data.";
            
            if ([storeURL checkResourceIsReachableAndReturnError:&error] == NO) {
                [self copyDatabaseFromBundle:storeURL];
            }
            
            //Handle lightweight version migration
            NSDictionary *options = [NSDictionary dictionaryWithObjectsAndKeys:
                                     [NSNumber numberWithBool:YES], NSMigratePersistentStoresAutomaticallyOption,
                                     [NSNumber numberWithBool:YES], NSInferMappingModelAutomaticallyOption, nil];
            
            if (![_persistentStoreCoordinator addPersistentStoreWithType:NSSQLiteStoreType configuration:nil URL:storeURL options:options error:&error]) {
                
                //Just Start Over.
                [self deleteDatabase:storeURL];
                
                if (![_persistentStoreCoordinator addPersistentStoreWithType:NSSQLiteStoreType configuration:nil URL:storeURL options:nil error:&error]) {
                    
                    // Report any error we got.
                    NSMutableDictionary *dict = [NSMutableDictionary dictionary];
                    dict[NSLocalizedDescriptionKey] = @"Failed to initialize the application's saved data";
                    dict[NSLocalizedFailureReasonErrorKey] = failureReason;
                    dict[NSUnderlyingErrorKey] = error;
                    error = [NSError errorWithDomain:@"YOUR_ERROR_DOMAIN" code:9999 userInfo:dict];
                    
                    NSLog(@"Unresolved error %@, %@", error, [error userInfo]);
                }
            }
        });
        
    }
    
    return _persistentStoreCoordinator;
}

C’est tout!

iOS 8 Suggested Apps

October 15, 2014

New in iOS 8 are lock-screen suggested apps on iOS 8.    There has been much speculation on how there work, but no definitive confirmation from Apple, even in their forums.   I now have a request from a client to leverage these, which is difficult given the typical opacity from Apple.      It seems here is what is known:

1) Based on location (DUH)

2) Installed apps use a different suggestion mechanism than apps which aren’t installed.

3) Installed apps can pay attention to app established geofences, etc.  And if you’re within one of their registered geofences, (or an iBeacon range) then an app will appear on the lockscreen in the lower left.

4) Apps that haven’t been installed rely on some undisclosed Apple Algorithm, likely related to their correlation of an App, and their Maps data for that’s businesses locations.  There doesn’t appear to be anyway to influence Apple on this currently through the app submission process… However I have a few levers to pull to ferret this out.  This is the use case which I think most App developers are interest in, as it’s a novel way to promote an app apart from the chaos that is the app store.

5) Yes they can be turned off in Settings->iTunes & App Store->My Apps / App Store…     annoying that most the posts are on how to disable the feature, rather than how to leverage them.

6) Feature is enabled by default.

Will test this out in the next few days and report back.

Xcode Shortcuts FTW!!!

December 30, 2013

Best shortcut ever in Xcode:   ctrl-command Up Arrow   (Toggles to .h or .m file in editor)    Also Awesome… add Option into the mix to turn the secondary editor back into “Counterpart” mode.    So…    ctrl-option-command-uparrow

Impatient Mozarella Recipe

June 14, 2013

Ingredients

  • 1/16 teaspoon lipase
  • 1/2 teaspoon citric acid
  • 1/8 teaspoon rennet
  • Water.
  • 1/2 gallon non-homogenized milk (super fresh required.. otherwise you get ricotta)
  • Salt to tast ~1.5 teasoon.

Equipment:

  • Slotted Spoon
  • 4 qt pot
  • microwave
  • microwavable bowl
  • stovetop
  • thermometer which can read from 80 degrees F to 120 degrees F.

Method:

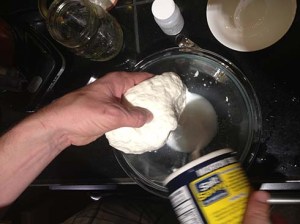
  1. Add the milk to the pot.    Sprinkle the Lipase on top of the milkIMG_5046
  2. Dissolve the citric acid in 1/4 cup water.   Ensure it’s completely diluted.  (I nuke it to make it go faster.. then add some more cold water or an ice cube to cool it down again.)
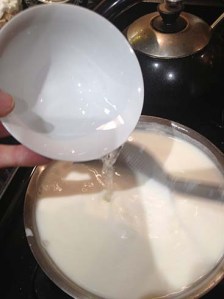
  3. Add the dissolved citric acid to the milk while stirring vigorously.IMG_5047
  4. Turn the stove on medium or medium high (extra impatient)
  5. Stir the milk until it reaches 88degrees F.   (Just like Back to the Future. )IMG_5049
  6. Vigorously stir in the rennet. (20 seconds)
  7. Stir the milk in a swirling motion, just enough to keep it moving.
  8. Milk will curdle around 104-120 degrees F..     If it hasn’t.  your milk is awesome and you should probably add some more diluted citric acid.
  9. STOP STIRRING AS soon as it curdles.IMG_5051
  10. Wait 30seconds of a minute..
  11. Using the slotted spoon Start collecting the Curd to one side of the pot.    (takes a couple minutes.IMG_5053
  12. If you’ve hit 120 degrees F, or if the curd is stretchy “melting off the slotted spoon” label it into the microwaveable bowl.IMG_5057
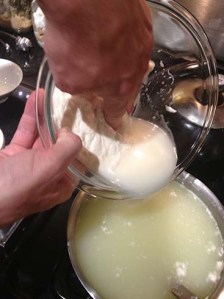
  13. Drain the first batch of whey off of the bowl back into the pot.IMG_5064
  14. Put the cheese on the edge of one hand so that both sides hang off..    let gravity strech it.     If it wont stretch… then put the bowl in the microwave with the cheese and nuke it for 30 seconds and try again.  (May have to do twice.)IMG_5072
  15. Add the salt to the newly accumulated whey in the bowl and mix it in with the other hand.IMG_5068
  16. Dip the cheese in the salted whey.
  17. Repeat the gravity stretch, dunk process until the surface of the cheese is smooth looking.    Don’t over stretch or it will be tough.
  18. That’s it.    Eat within a few hours     Don’t refrigerate.

WWDC 2013 Wishlist

April 25, 2013

WWDC

Apple’s platform has gotten…   well..   a bit stale.    Here’s my list of things that Apple could announce at WWDC which would reinvigorate the iOS platform for me personally.

Software

  • Homescreen widgets SDK
  • Make Siri actually understand me more than 20% of the time (being generous)
  • Siri Integration for apps (Assuming above gets fixed)
  • GameCenter Chat support.
  • OCR SDK that doesn’t suck for input. – Tesseract is fickle.  The tech is out there… make it mainstream for input.
  • Fix iCloud & Open it up to other platforms   Or at least a Web Platform.
  • UI Theming / Skin Support.
  • Open up Spolight API so app content can be searchable in Search homescreen.
  • Customizable Spotlight Search Options.   Why can I still not search the appstore from Spotlight?
  • iCloud Repsonsive Web Support
  • iCloud Web app platform

Hardware

Ok.   WWDC isn’t really ever about Hardware Anymore, but when new bizarre things get added to hardware it stimulates the app market for new and interesting mash ups and uses that people hadn’t thought of before.

  • More Phone Sensors (Track Eye Movement, Near Field Communications, Temperature)
  • Failing more sensors… Peripherals with more sensors (iWatch, Glasses)
  • Peripheral Platform and SDK in support of 3rd party wirelessly linked gadgets.
  • Loosen up on the MFI (Made for iPhone) program.     – Currently this just isn’t open to anyone without retained legal council.  Period.
  • Camera Improvements.  UV InfraRed Camera sensitivity  Optical Zoom (fluid lenses?)

Decompiling Android APKs

January 28, 2013

So last week needed to take a look at an existing app in the google play store to see if it was generated using one of the Mobile Enterprise Application Platforms (Appcellerator, / PhoneGap, etc.)  tools.   (Example below is actually one of my own apps…  just for demonstration purposes.)    Figured I’d add it to the blog so all the steps are in one place.   The other mentions I found on how to do it were scattered about.

  1.  Get the APK you want to decompile off of your android device:   Connecting the device to your computer and launching the DDMS in Eclipse won’t actually show you the contents of /data where installed apks and apps are installed unless you root your device.    That seemed like a pain… so instead, I found this:
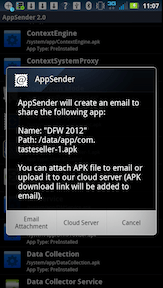
    1. Install app sender on the device:  AppSender 2.0 (Share APK)
    2. Ensure that  the device ISN’T connected to your computer.   (AppSender thinks it needs the SD card in order to run, and this is unmounted when plugged in on USB. (at least with Moto Droid Razr max 2.3.6 and Mac OS X 10.7.5)
    3. Find the app you want to get off the phone in the list that AppSender presents and tap it.
    4. Tap “Email Attachment”     device-2013-01-28-110728
    5. Send it to yourself using the Mail Intent of your choice.
    6. Save the attached APK file off somwhere on your computer.
  2. Download and install dex2Jar  on your computer:   http://code.google.com/p/dex2jar/downloads/list
  3. Run dex2Jar on the APK:     (This will get you as far as class files on your computer.)
    $ ./dex2jar.sh ../com.tasteseller-1.apk
    this cmd is deprecated, use the d2j-dex2jar if possible
    dex2jar version: translator-0.0.9.12
    dex2jar ../com.tasteseller-1.apk -> ../com.tasteseller-1_dex2jar.jar
    Done.
  4. Download JD-GUI  and Install on your computer. (Java Decompiler) http://java.decompiler.free.fr/?q=jdgui
  5. Run JD-GUI…     Open the jar file:  File->Open File… (select the jar file from above:)
  6. Browse the Code:   (obviosuly if the original APK was obfuscated the results here last step may be totally illegible…   but happily it did just fine on the app I needed to check out.)
    Screen Shot 2013-01-28 at 11.34.20 AM
  7. There is no Step 7.   That was everything!

The follow up article:     How to obfuscate Android Code so that this isn’t doable.

Core Data Model Mapping

July 2, 2012

Here is the basic process for migrating from one Data Model to a bother in Core Data between versions.   When you need to drastically change the ERD.    The original question this is in response to is here:

http://stackoverflow.com/questions/11174773/migrating-a-many-to-many-relationship-to-a-join-table-in-core-data

1. Create a versioned copy of the Data Model. (Select the Model, then Editor->Add Model Version)

2. Make your changes to the new copy of the data model

3. Mark the copy of the new data model as the current version. (Click the top level xcdatamodel item, then in the file inspector set the “Current” entry under “Versioned Data Model” section to the new data model you created in step 1.

4. Update your model objects to add the RecipeIngredient entity. Also replace the ingredients and recipes relationships on Recipe and Ingredient entities with new relationships you created in step 2 to the RecipeIngredient Entity. (Both entities get this relation added. I called mine recipeIngredients) Obviously wherever you create the relation from ingredient to recipe in the old code, you’ll now need to create a RecipeIngredient object.. but that’s beyond the scope of this answer.

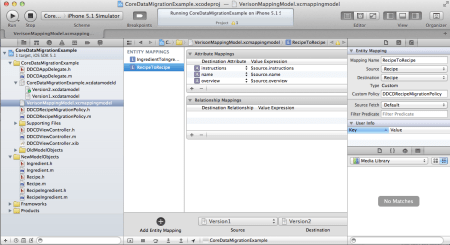
5. Add a new Mapping between the models (File->New File…->(Core Data section)->Mapping Model. This will auto-generate several mappings for you. RecipeToRecipe, IngredientToIngredient and RecipeIngredient.

6. Delete the RecipeIngredient Mapping. Also delete the recipeIngredient relation mappings it gives you for RecipeToRecipe and IngredientToRecipe (or whatever you called them in step 2).

7. Drag the RecipeToRecipe Mapping to be last in the list of Mapping Rules. (This is **important** so that we’re sure the Ingredients are migrated before the Recipes so that we can link them up when we’re migrating recipes.) The migration will go in order of the migration rule list.

8. Set a Custom Policy for the RecipeToRecipe mapping “DDCDRecipeMigrationPolicy” (This will override the automatic migration of the Recipes objects and give us a hook where we can perform the mapping logic.

9. Create DDCDRecipeMigrationPolicy by subclassing NSEntityMigrationPolicy for Recipes to override createDestinationInstancesForSourceInstance (See Code Below). This will be called once for Each Recipe, which will let us create the Recipe object, and also the related RecipeIngredient objects which will link it to Ingredient. We’ll just let Ingredient be auto migrated by the mapping rule that Xcode auto create for us in step 5.

10. Wherever you create your persistent object store (probably AppDelegate), ensure you set the user dictionary to auto-migrate the data model:

if (![__persistentStoreCoordinator addPersistentStoreWithType:NSSQLiteStoreType

configuration:nil
URL:storeURL
options:[NSDictionary dictionaryWithObjectsAndKeys:[NSNumber numberWithBool:YES], NSMigratePersistentStoresAutomaticallyOption, nil]
error:&error])
{
}

**Subclass NSEntityMigrationPolicy for Recipes**

#import <CoreData/CoreData.h>

@interface DDCDRecipeMigrationPolicy : NSEntityMigrationPolicy
@end

**Override createDestinationInstancesForSourceInstance in DDCDRecipeMigrationPolicy.m **

<!– language: lang-c –>

– (BOOL)createDestinationInstancesForSourceInstance:(NSManagedObject *)sInstance entityMapping:(NSEntityMapping *)mapping manager:(NSMigrationManager *)manager error:(NSError **)error
{

NSLog(@”createDestinationInstancesForSourceInstance : %@”, sInstance.entity.name);

//We have to create the recipe since we overrode this method.
//It’s called once for each Recipe.
NSManagedObject *newRecipe = [NSEntityDescription insertNewObjectForEntityForName:@”Recipe” inManagedObjectContext:[manager destinationContext]];
[newRecipe setValue:[sInstance valueForKey:@”name”] forKey:@”name”];
[newRecipe setValue:[sInstance valueForKey:@”overview”] forKey:@”overview”];
[newRecipe setValue:[sInstance valueForKey:@”instructions”] forKey:@”instructions”];

for (NSManagedObject *oldIngredient in (NSSet *) [sInstance valueForKey:@”ingredients”])
{
NSFetchRequest *fetchByIngredientName = [NSFetchRequest fetchRequestWithEntityName:@”Ingredient”];
fetchByIngredientName.predicate = [NSPredicate predicateWithFormat:@”name = %@”,[oldIngredient valueForKey:@”name”]];

//Find the Ingredient in the new Datamodel. NOTE!!! This only works if this is the second entity migrated.
NSArray *newIngredientArray = [[manager destinationContext] executeFetchRequest:fetchByIngredientName error:error];

if (newIngredientArray.count == 1)
{
//Create an intersection record.
NSManagedObject *newIngredient = [newIngredientArray objectAtIndex:0];
NSManagedObject *newRecipeIngredient = [NSEntityDescription insertNewObjectForEntityForName:@”RecipeIngredient” inManagedObjectContext:[manager destinationContext]];
[newRecipeIngredient setValue:newIngredient forKey:@”ingredient”];
[newRecipeIngredient setValue:newRecipe forKey:@”recipe”];
NSLog(@”Adding migrated Ingredient : %@ to New Recipe %@”, [newIngredient valueForKey:@”name”], [newRecipe valueForKey:@”name”]);
}

}

return YES;

}


This should look like this in Xcode when you’re done:

Also note that the Xcode Core Data model mapping stuff is a bit flaky and occasionally needs a “clean”, good Xcode rester, simulator bounce or all of the above get it working.

Feta Recipe

April 5, 2011

Background

I started out cheesemaking about 4 years ago with this book here: http://www.cheesemaking.com/HomeCheeseMakingbook.html From which I had mixed results.  It’s not very exacting in its use of language which drives me a bit  crazy.   But most the chesses have turned out well.  If not exactly as they should be, they’re still delicious.    It also seemed to have very inconsistent measurements for things like rennet and culture.

My Feta (I use cows milk sadly, since I have no reliable source of goat milk) *occasionally* gets runny after a few days (but still delicious as a cracker spread) , so I’ve backed WAY off the culture, and increased the salt which inhibits culture growth.

FETA

Finished Product

Time: (45 minutes actual work… spread over over 12 hours) Difficulty: Easy

Ingredients

Ingredients

You can get most of the following for  much cheaper from various places.   I only grabbed them all from the same place to make this easier to follow.

1 Gallon Whole Milk (NOT Ultra-pasteurized!!)

1/2 teaspoon MA11 culture

1/4 teaspoon lamb lipase (if not using goatmilk)

1/2 teaspoon calcium chloride (if using homogenized / pasteurized milk)

1/2 teaspoon liquid rennet diluted in 1 Cup Cool, non chlorinated water

Distilled water for the above. (I skip this now and just use tap. )

1 1/2 teaspoons non-iodized salt (kosher or sea salt)

Equipment

Equipment

Steel measuring spoons

Curd knife Stainless Steel Pot (1 gallon min)

Small sauce pan.  (I’m too lazy for this step anymore)

1 small bowl.

Cheesecloth.  (i’m bad I use the dispoable plastic variety as I don’t like boiling it afterwards with baking soda to clean it.)   Cheese making is messy enough with out all that!

Colander

Accurate low temperature thermometer  (Meat thermometers are generally OK (clean of course).   Candy thermometers NO!)

Method

1) Fill Sink with Hot water from the tap, Set Gallon of milk in the water to start warming it up. (Target Temp is 86°F)

Preheating Milk

2) Meanwhile, Sterilize equipment (NOT THE THERMOMETER!!!  IT WILL BREAK / MELT if it’s low temperature. I use denatured alcohol and a paper towel to sterilize that. )    by boiling it with some tap water in the Stainless steel pan for a few minutes. Drain somewhere clean.   Sterilization is probably less of an issue for this cheese, as it doesn’t really age.

Sterilizing

3) Boil distilled water in small saucepan to sterilize. Cover and place in refrigerator to cool.  (I lately have been skipping this step.. just using plain filtered water…   doesn’t seem to impact feta. )

Sterilizing Distilled Water

4) Wipe down the milk container and pour milk into the stainless steel pan. Check the temperature, place the pan back in the water in the sink if it’s not at 86°F yet.

Milk into sterlized pot

5) Once the Milk reaches 86°F, add the lipase (1/4 t. ) and the culture (1/2 t.) Let it sit on top of the milk for a minute or two, then stir it in with the curd knife.

Forgive the bizarre aspect ratio. Stupid wordpress

6) Remove Pot from sink. Let sit covered for 1 hour, periodically checking the temperature. (If it goes below 86, put it back in the water bath in the sink to warm up.

7) After the hour is up, add 1/2 Cup distilled water from the fridge to the small bowl and mix in the 1/2 t. Calcium Chloride. Add to the Milk, stirring well.

8 ) Mix the remaining 1/2 Cup of distilled water with the 1/2t. rennet in the small bowl. Add to the milk and mix well for a minute. (If the milk starts to curdle, then STOP mixing immediately)

9) Leave for 1 Hour and do not disturb.

10) By now you should have a yogurt looking mass of curd which may have pulled away from the side of the pan.

11) Cut it into half inch cubes with the curd knife: (hold the curd knife vertical and cut a grid, then hold it at a 45 degree angle to cut the columns of curd in the grid.

12) Let sit for 20 minutes. (Or longer at 86 if you want firmer cheese.)

13) Meanwhile cut a large square (2 ft square of cheese cloth) line the colander.

Collander lined with Cheesecloth

14) Drain the curds through the cheesecloth.  (This can be quite messy pouring the curds into the cheese cloth.   The longer you waited, the less messy.

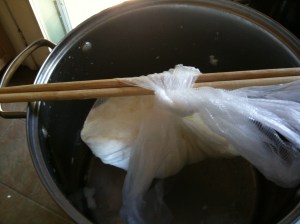
15) Bring the corners of the cheese cloth together and tie off. Hang the cheese cloth from something to drain for 4 hours.  (Or overnight is what I usually do)

All Tied Up

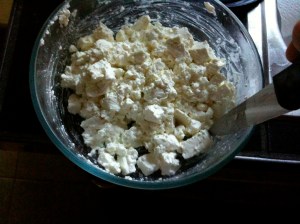
16) Unwrap the cheese cloth. Place the cheese in a large glass storage container an cut it into 1” cubes. Add salt and gently mix.

Salting

17) You can eat immediately (well ok.. let it sit at least a few hours for the salt to diffuse) or keep up to a month and a half in the fridge. (Cheese gets better with aging, though sometimes gets gooey. Still tastes great though. )